Thursday, July 28, 2016

Design Communication

After a semester of Design Communication lessons, I have learnt to construct technical drawings with the drawing tools such as T-square ruler, Adjustable Triangle Ruler, Scale ruler and many more. Moreover, I also learnt to make building model and facade design model. Although I didn't do well in some of my work, but I found interesting in producing them. I've also learnt to cooperate with my team mates to give our best for group projects. These are all my works within the four months of lessons. 

Front Cover
Table of Content

Freehand Vertical & Horizontal Drawing

Architecture Lettering

Multiview Ortographic Projection (Plan, Elevation X, Elevation Y & 3D View)
Understanding The Plan, Elevation & 3D Views Drawing (3D Blocks) 

Layout Plan, Ground Floor Plan
Layout Plan, First Floor Plan

Section X-X & Section Y-Y

Right Elevation

Constructing One Point Perspective Grid Lines

Constructing One Point Perspective Grid Lines with Objects

Constructing Two Point Perspective Grid Lines

Constructing Two Point Perspective Grid Lines with Objects

Constructing The Oblique Drawing 30°-60°

Axonometric & Perspective (Test Drawing)

SnowFlake Cafe Façade Design presentation board 

The White Villa Model Making presentation board

Wednesday, June 29, 2016

Double Storeyed Site Study - Construction & Technology

On this assignment, we were to do a site study on a double storey house, to choose an elements of the house. We had visited Felicia's double storey house which is located at Tanjung Malim. The element I chose on this site study is staircase. The type of staircase in her house is L-shaped. I had measured all the dimensions of the staircase details, including thread, riser, hand rail and the hand rail. The apparatus I used to measure was measuring tape.
I measured the dimension of the thread.
I measured the dimension of the riser.
I measured the length from the landing thread to the wall.

I measured the dimension of the hand rail.

I measured the dimension from the landing thread to the floor.

After doing the measuring process, I have did some researches on the internet to understand more about how to install the staircase in a double storey house. 
This is the staircase looks during the construction of this house.
After construction, the staircase is stable and well-functioned.
The steps of installing a staircase:

1. Establish the perimeters of the space.
2. Determine the starting point.
3. Mark a line from bottom to top.
4. Purchase and transport the materials.
5. Install the stair stringers.
6. Situate the threads and risers, and handrail.
7. Install a standard handrail parallel with the stringer using vertical spindles.
8. Finish out with carpet or hardwood.

From this assignment, I have learnt about the construction process and understood about the details of the staircase. It was a great experience to go for a site study as I can discover the real staircase myself. Staircase is the main element for a double storey house as it connected the ground floor to the first floor. Therefore, the installation of the staircase must be with a suitable height and very stable.

Thursday, May 19, 2016

Project 2- Intro To Design

In project 2, we were going to study anthropometrics and ergonomics. I created a mascot character with super ability. Before that, I illustrated a storyboard on 2 A3 cartridge papers for my character. I have created a new character, her name is called Pallegro. She is a female and get things done very fast and quick. I also created some costumes and weapons to upgrade her. The colour i chose for her is pink because pink is one of my favourite colour and it is the best describe colour for a female. 

Storyboard 1
Storyboard 2

After that, I built a model for Pallegro using modelling cards and different pink colour scheme craft papers. The height of the model is about 12cm. I did some changes on her hair, face and legs after get some advice from our lecturers. I made a 3D hair for her and she is looking good now.

Front view 
Side View
Side View
Back View

Then, I drew 12 poses of my daily activities with architecture drawing. I took some photos of my daily activities and then chose three of the poses, which are bending, pushing and sitting. I also did some researches on the internet for my reference. The scale I used for the drawing is 1:20. For the mediums of the drawing, I used the black felt tip pens with different intensities. 

12 Daily Activities
Bending Poses
Pushing Poses
Sitting Poses

During this assignment, I've learnt more about the study of anthropometrics and ergonomics. I need to do more practices on human architecture drawing, to make it more consistent and with proper scale and proportion.

Wednesday, May 18, 2016

Skeletal Structure of A Building Construction - Construction & Technology

During our Construction & Technology tutorial session, we were assigned into a group of 3-4 person to construct a skeletal structure of a basic building. The structure contains of a footing, 4 columns, bean and slab. The materials we used were 4 blocks of plasticine, A4 papers and masking tape. We discussed on how to build the skeletal structure with reinforcement and strong like an actual building.

First, we pressed the plasticine into a rectangular shape as footings.  


Next, we used the blade cutter to cut the edges of the plasticine, make it well-shaped and have sharp edges. We provided 2 holes at the left side and 2 holes at the right side of the footings plasticine.

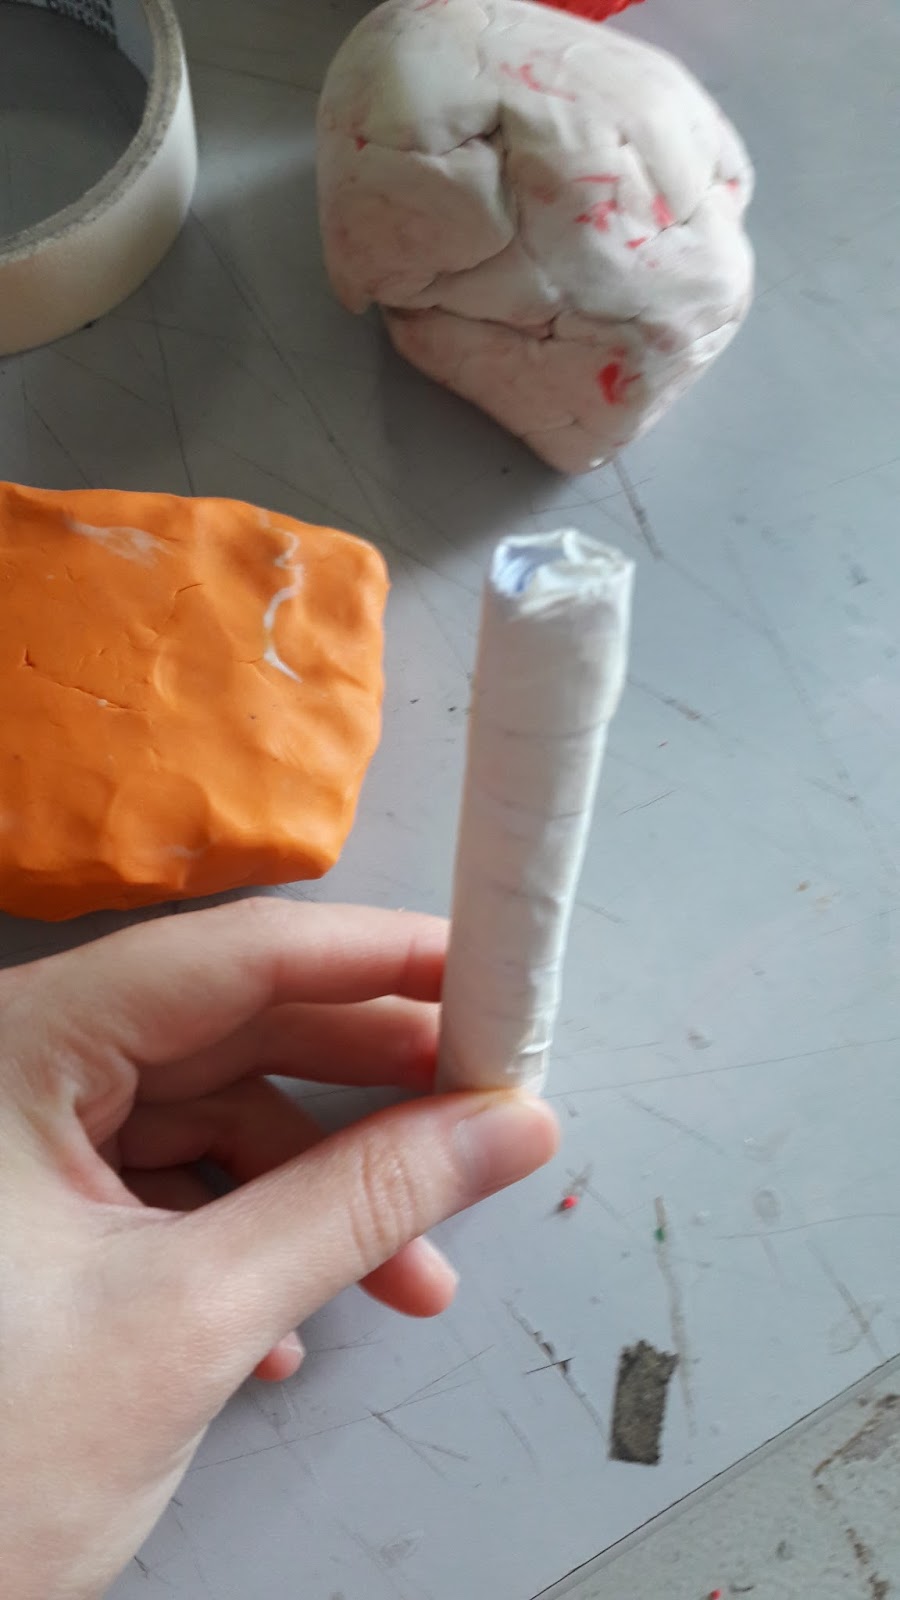
Then, we rolled the A4 paper into cylindrical shape to become reinforcement for the 4 columns.

The columns were also wrapped with masking tape so that they are well-attached. 

There after, we folded the columns into ‘L’ shape and attached them into the 4 holes at the left and right side of the footings.

As it was not stable enough, we added 2 reinforced concrete at the 2 sides of the footings with red plasticine.

Later, we rolled the A4 paper for the beam. We folded it into a rectangular shape to fit the 4 columns.

We used masking tape to connect the ends of rectangular shape beam.

Then, we attached the beam around the 4 columns. 

We added more white plasticine around the beam and 4 columns become stronger and harder. 

Last but not least, we pressed the white plasticine into rectangular shape to act as the slab. We attached the slab onto the top of the beam.

This is how our group’s skeletal structure of a building looks like.


I’ve learnt about how a building being constructed with reinforcement and the ascending order of the construction. Thanks to Ms.Sharon for giving me a chance on learning how to construct a building using plasticine and understanding the details of the construction. 


Tuesday, May 17, 2016

Project 1B - Intro To Design

In Project 1B, I was to identify my chosen insect's characteristics, keywords and design language. I had to work on 2D abstract representation, and then transform them into 3D abstract model. Then, I drew my ideas on 4 butter papers. After getting advice from the lecturers, I edited my composition to make them attach together. I drew a final abstraction composition on an A3 cartridge paper. 

After did all the 2D abstract composition, I started to do the 3D abstract model. The materials i used for the 3D abstract model are different thickness of modelling cards, modelling boards, strings and A4 MDF board. My model is made up with the combinations of lines, planes and volumes too. I did a mock-up model before improve it to the final model. I changed the composition of the mock-up model so that it did not look messy and it looks more organized. 

Furthermore, I did a photo composition of my 3D abstract model for documentation on an A3 cartridge paper. This is the second model I made, which is a great experience. I've learn from my mistakes and got advice from the lecturers. Thanks to our lecturers and my friends for helping me and guiding me during the making process as it was not an easy task.  

2D Abstract Drawing

3D Abstract Model

Different angle view of my 3D abstract model

Top View

Zoom in details

Photo composition